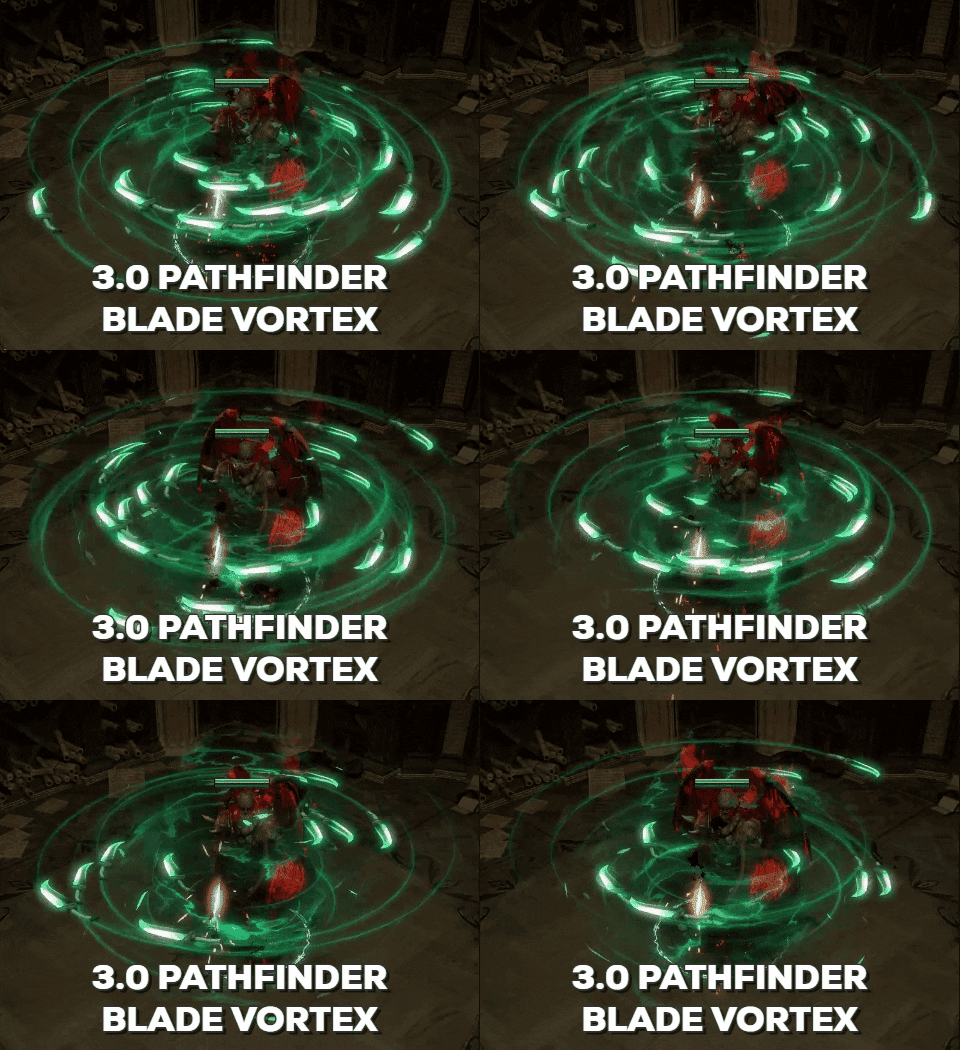
3.1 Updated - Pathfinder Crit BV - Dedicated Uber Lab Farmer - 375%+ Movement Speed

I spent thousands of jewellers just trying to get the 5th socket blue and on my first try getting the 6th socket it also gives me a blue. Dark pact lab runner anyone? Haha Is there a market for 6 off QOTF?
"
MethodsOfMayhem a écrit :
I spent thousands of jewellers just trying to get the 5th socket blue and on my first try getting the 6th socket it also gives me a blue. Dark pact lab runner anyone? Haha Is there a market for 6 off QOTF?


LOL!

I've seen this happen to a few people now. It's hilarious. My 6th socket was red first time around.

Not sure what you'd even do with 6b though. Still pretty neat.
Two questions. First, I'm working on leveling my character in maps now, do you think that Carcass Jack would be a good choice for chest, or should I continue using Tabula? I have Rat's Nest, Atziri's Step/Promise, Essence Worm, just need to work on my resists right now.

Second question, I have this dagger that dropped for me a little bit ago, how do you think it would be for a starter dagger? I can craft Spell Damage from Catarina onto it still

Dernière édition par xvxslave#2172, le 23 août 2017 10:08:44
Hello mate, im struggling with dying on 3rd phase today. https://www.pathofexile.com/account/view-profile/Zniwcio/characters thats my whole equipment + passive tree, what can i change to improve my defense/dmg?
How well would this character be for general mapping, changing chests for a carcass for some aoe?
IGN: BurtsyBees
Dernière édition par Gandollf#5247, le 23 août 2017 11:56:46
"
Gandollf a écrit :
How well would this character be for general mapping, changing chests for a carcass for some aoe?


It works "okay".. Not going to be as good as a map clearing build, but you can clear fine, just slower. I was doing a couple T15's with friends last night at 79 and it was fine.
I started farming Uber Lab at 77 with 3600 life, 1500 mana.. Can have some scary moments, but if you play smart and drop plenty of decoy totems it's not bad... I havent actually died to Izzaro yet-
Definitley some pucker moments though :)
How is the hc viability? Im tempted to go for this build, but im afraid the life is a bit too low? Do you have any tips for playing BV in hc? Great work anyway.
"
xvxslave a écrit :
Two questions. First, I'm working on leveling my character in maps now, do you think that Carcass Jack would be a good choice for chest, or should I continue using Tabula? I have Rat's Nest, Atziri's Step/Promise, Essence Worm, just need to work on my resists right now.

Second question, I have this dagger that dropped for me a little bit ago, how do you think it would be for a starter dagger? I can craft Spell Damage from Catarina onto it still


Seems look a decent starting weapon. As always I would suggest plugging it into path of building to determine the value of crit multi over a high spell damage roll.

Carcass Jack is very nice for leveling but I found it to be too expensive and unnecessary.


"
Zniwcio a écrit :
Hello mate, im struggling with dying on 3rd phase today. https://www.pathofexile.com/account/view-profile/Zniwcio/characters thats my whole equipment + passive tree, what can i change to improve my defense/dmg?


I already have a good idea of whats happening because I think it's the same thing that happened to me a few times.
The lieutenant that looks grey / frosty has a reflect mechanic that will basically 1 shot you if you crit him.
Look out for him when he has the snowflake circulating around his feet.

Other than that your gear and character looks well put together. Good job!


"
Gandollf a écrit :
How well would this character be for general mapping, changing chests for a carcass for some aoe?


Can't really go wrong with a Carcass Jack if you can afford the luxury. I personally mapped with tabula until level 90 but that was at the start of the league before I made some currency.
At the moment I'm clearing all content with 6l QoTF and would not swap to Carcass Jack in the current situation.
Dernière édition par Jelbishi#4770, le 24 août 2017 03:18:13
"
Satisfaction a écrit :
"
Gandollf a écrit :
How well would this character be for general mapping, changing chests for a carcass for some aoe?


It works "okay".. Not going to be as good as a map clearing build, but you can clear fine, just slower. I was doing a couple T15's with friends last night at 79 and it was fine.
I started farming Uber Lab at 77 with 3600 life, 1500 mana.. Can have some scary moments, but if you play smart and drop plenty of decoy totems it's not bad... I havent actually died to Izzaro yet-
Definitley some pucker moments though :)


You nailed it brother, ty for helping with the question.
Glad you got things up and running :)
Always sketchy playing at low EHP but you can get the job done if you're smart.
"
Jelbishi a écrit :


"
UPDATE LOG
I've been adjusting the guide frequently based on my 3.0 experience with the build.

8/11/2017
Spoiler
- Added Ice Golem and moved Rallying Cry to the socket previously occupied by Minion and Totem Resistance.
- Created a new Path of Building link to reflect more accurate levels of damage and movement speed.
- Removed the Jaws of Agony unique shield from the guide.
- Changed the 6l BV gem priority to cause less confusion.


8/13/2017
Spoiler
- Shaper and ALL Guardians are killed with this character. The gear used will be in this spoiler.
Spoiler

*I have a shaper video of the kill but it was poorly executed so I will work on cleaning it up. (was my first kill since early 2.6)

- Fixed the gear section to be more concise about gear choices.
- Removed old youtube path of building guide as some of the information it provided has been changed.
- Changed gem section to show gems rather than just text.


8/16/2017
Spoiler
- Added Video to explain the easiest way to get off colors. You can see it HERE or navigate to the video OR gem section of the guide.


8/21/2017
*Important*
Spoiler
- I've decided I am going to renovate the guide and include A LOT more information on what makes this build go quickly.
- Completely over-hauled gear section to include stat priority and detailed gear explanations.
- Change title of forum post to accurately depict the potential movement speed gain with a well geared character.
- Included updated skill tree's located in the "Passive Tree" section of the guide.
- Updated the Path of Building pastebin to accurately simulate the character I was using off stream to get my best rank 1 times.
- Updated the gem section to include a Path of Building link that shows my BiS gem and enchant setup for movement speed.
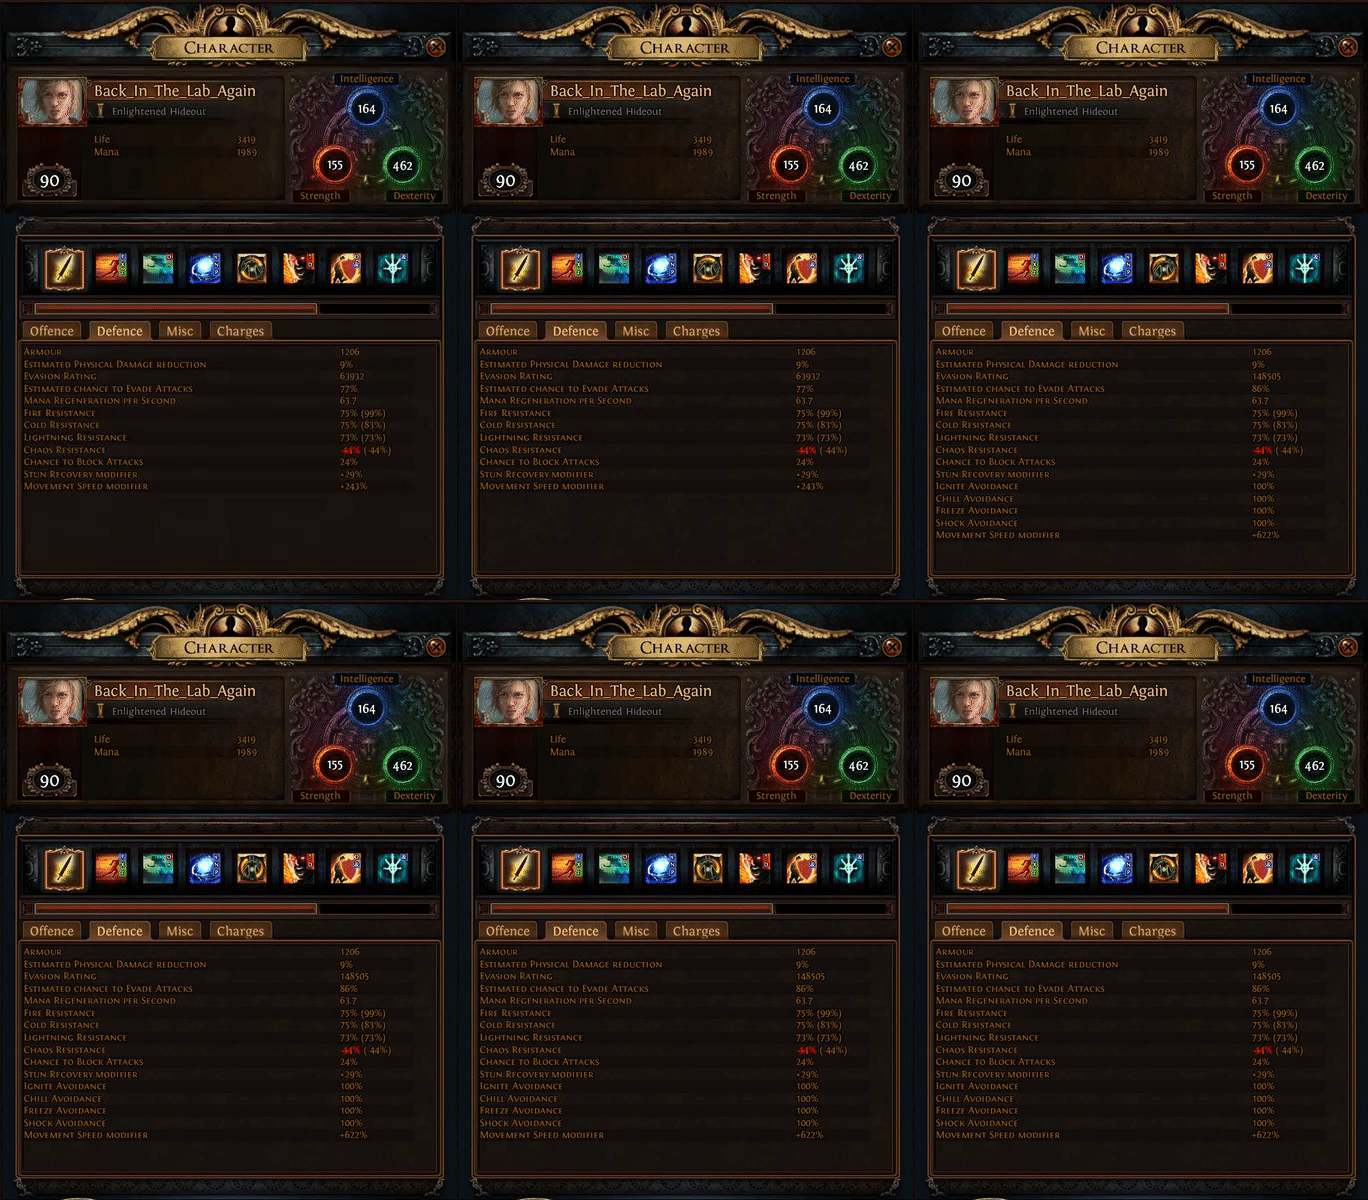
- Added screen shot of the Defensive information tab.
*****Note* This is actually how fast I run in lab. No smoke mine buff to pad meters.
- Updated video section to include a strategy explanation that talks about what I do to gain a competitive edge
- Added BiS enchants to the appropriate gear sections: Helm - Boots - Gloves
- Updated leveling section to better explain the transition into the endgame build and skill tree
- Added Path of Building link to show the gear and skill tree changes necessary to kill Shaper and his Guardians.

8/23/2017
Spoiler
- Added Deathless Shaper Kill kill to the video section.
*****This build guide is not for an endgame boss farmer. I just wanted to show you that if you change the appropriate gear, it was possible.


Introduction
This build is specifically designed to farm the Endgame Uber Lab efficiently. This is not the fastest character and will not break any records. Please keep reading with the expectation of generating currency and not rank 1 jewels.


I will be streaming this character live @twitch.tv/Jelbishi if you have questions or comments this will be the easiest way to contact me for an immediate response.

Pros & Cons:
Spoiler
PRO:
An undeniably efficient build that combines insane movement speed, excellent damage, up to 90% chance to evade, and up to 25% chance to block.

CON:
The build is one of the more annoying things to level with until you pass a certain gear threshold and have properly leveled gems. Getting the colors needed on most gear will be an absolute pain in the neck without having a fair amount of currency.


Video Section:
Spoiler
I will fill this section with more relevant videos as I produce them in 3.0

Deathless Shaper Kill - Never said this build was a DPS powerhouse... Just wanted to show you that only a few changes are needed to reliably kill The Shaper and his guardians.
*Path of Building Pastebin: https://pastebin.com/fbmNgxp5
*This is exactly what gear I used in the video


Day 2 of Harbinger League this build is up and running 407% Movespeed without leveled up gems and at level 85.

If you're wondering about the gear used in the video I will link it all in this section as a snapshot.
Gear


3.0 Rank 1 Uber Lab Aug. 7th - 8th Layout.
Messed up a lot in this video. Should not have been using smoke mine. Just wanted to do some testing. Ended up getting very lucky with easy traps and intuitive tile sets.

A very clean Rank 1 Video on Aug. 12th - 13th Layout.
548% movement speed and new gear.

A 0 Link BV example video 0 Link BV

My Ring Swap Strategy that I use to gain a competitive edge and get rank 1.

How to get off colors on your gear using jewellers and not chromatics.


Gear:
Spoiler
Please disregard socketed gems in this section. If you need to know what gems to use please look for the section of the guide labeled "Gems"

Click the spoilers underneath each piece of gear for a detailed explanation.

Weapons

Running:
Spoiler
This unique property that grants extra movement speed when you kill is perfect when you combine it with your BiS glove enchant "Commandment of Flames". Do not go out of your way to make this speed increase happen, all it takes it 1 blade vortex stack to proc the effect and since we scale crit, It will occasionally decimate an entire pack and will give you all the flask charges you need.


Killing:
Spoiler
A rare dagger will be BiS but the Divinarius will allow you to farm comfortably until you can make enough money to spend some exalts on something better.

Stat Priority: Spell damage >70% - Spell crit > 130% - Crit Multi Any% - Damage to spells.
As always, I suggest you plug any potential upgrades into Path of Building and see if it's worth your money.


Shields

Running:
Spoiler
Ideally you want a Laquered Buckler because it will have the highest evasion potential. This item is only going to serve 1 purpose. Making you run fast. No stats matter other than evasion and dexterity.

Stat Priority: 1500+ Evasion. Try to get dexterity on the item because it increases your evasion by 1% per 5 dex.


Killing:
Spoiler
You'll be swapping to this item to fight Izaro. It's basically a stat stick that buffs our damage by a crazy amount.

Stat Priority: Spell damage 50%+ - Spell crit 70%+ (*Note: It may be difficult to find a good shield. Try to get as much of each stat as you can and do not sacrifice much of 1 to get the other. Keep a good balance of each.)


Helm:
Spoiler
There are 2 options available for you here and it's important to understand the difference and not blindly pick 1 or the other.

Devoto's Devotion: Use this helm if you're seriously interested in putting up the best time on the leader board. It lowers your damage so it's not great for farming but it increases your movement speed by about 13% over the Rat's Nest.
Best Enchant: Phase Run Duration

Rat's Nest: If all you care about is making currency in the lab and you want as much damage as you can get. This is the best pick. As seen above, the best enchant would be blade vortex spell damage. Not much to say about this item because it clearly increases damage and has a lot of evasion on it so you'll end up running quickly.
Best Enchant: Blade Vortex Spell Damage


Chest:
Spoiler
This is the end game goal right here. You DO NOT NEED 6 LINKS. You will still be able to farm on a 4link if your character is level 85+ with decent gem levels and quality. I've demonstrated the builds maximum potential and have completed many Uber Lab runs on a 0-link BV with 1800 tooltip.

Please look in the gem section to find out the gem priority when socketing 4 or 5 link QOTF chests.

If you need to learn how to craft this Queen with the appropriate colors, please check this Video I made and it will explain exactly what needs to be done. This process is not cheap and I personally spent something like 1800-2000 Jewellers and 2400 Fusing crafting my own.

*Note* Please do not count on me to tell you the most efficient way to get the colors. Look at the market and do your own math to determine what strategy is best for you. With that being said.... It should take 6.5k Chromatics on average to hit these colors.


Boots:
Spoiler
Again I bring you 2 options for 2 types of people.

Atziri's Step: This is 100% the best choice if you're doing runs casually or just generally playing the character. For 99% of the people reading this guide I strongly suggest you play with this pair of boots.

BiS Enchant: Leech OR 1 to 160 Lightning Damage

Seven-League Step: I personally use these boots ONLY when I'm doing speed runs and trying to get rank 1 on the day. They offer the highest movement speed in game but completely lack any sort of defense. While I would absolutely recommend these boots for anyone trying to take the daily jewel; they're simply going to be an issue for most people who are not comfortable in the lab.

BiS Enchant: 10% Movement speed OR 1 to 160 Lightning Damage


Gloves:
Spoiler
This is a pretty simple choice, really. You are almost forced into rare gloves because of the many uniques this build uses.

Stat Priority: Evasion - Dexterity - Life

BiS Enchant: Commandment of Flames


Belt:

Spoiler
An example of a strong rare belt. It has the Vanguard base. High life. Enough resists for my character. MOST IMPORTANTLY Flask Charge Modifiers AND MOVESPEED.
All I need to do is divine this belt to 20/20 on the flask mods and it would be perfect.

Stat Priority: Life > Flask Effect > Reduced Flask Used > Inc Flask Gained > Vanguard Base > Flat Evasion > Resistances

Flask Effect Duration: This helps extend the rather short burst of speed you gain when you press your Jade / Stibnite / Quicksilver
Reduced Flask Charges Used: This helps tremendously with flask sustain and is wildly impactful.


Rings:
Spoiler
For some people these are the only 2 rings you are going to need.
Essence Worm: This is mandatory and should be socketed with the Hated Aura at all times.
Rare Ring: Gives a rather large increase to movement speed / dex / life / resists.

Stat Priority: Life > Dex > Open Prefix OR Inc Evasion% > Flat Evasion

Rank 1 Strategy
I kept this to myself for a while because it was helpful to gain a competitive edge.

This is a little tricky to explain but basically you socket a level 21 grace into The Voideye and you gain a hilarious amount of movement speed.
The hard part to explain is that you need to swap this ring in for the essence worm when you don't need the extra damage. Please look at this simple timeline in order to better understand what I mean.

-Start your run with Voideye equipped and Grace active
-Run all the way to phase 1 and enter the room
-Swap Voideye for your Essence Worm
-Activate Hatred Aura
-Kill Izaro
-Before you leave boss room, swap Voideye back in and activate Grace
-Rinse and repeat.


Amulet:

Spoiler
You might not find a good amulet for a long time. They'll be expensive (just like all other good crit gear). Remember that Dexterity gives 1% inc evasion per 5 points.

Stat Priority: Evasion% > Dex > Crit Multi > Spell damage > Life > Crit Chance


Jewels:

Spoiler
For jewels I would absolutely suggest using the Clear Mind because it's a cheap way to boost damage.
For more experianced players you can completely drop the clear mind for a very strong rare jewel.

Stat Priority: Evasion% - Crit Multi - Physical Damage - Area Damage - Damage - Life - Resists


Flasks:
Spoiler
This is the flask setup I was using to get the rank 1 jewels for 10+ days straight. You could change the quicksilver flask for increased duration rather than increased effect if you just plan on farming casually. There isn't much to say here other than these flasks boost movement speed by incredible amounts. Learn to use them efficiently and you'll become a force to be reckoned with.


Passive Tree:
Spoiler

Ascendancy Order of Importance
Nature's Boon > Master Alchemist > Nature's Adrenaline > Veteran Bowyer

http://poeurl.com/bugY Optimized tree for lots of life and decent damage

http://poeurl.com/bugU Optimized for maximum movement speed and damage (My personal tree for getting rank 1)


Help Alira the bandit for Crit multi, resists, mana regen.

Check the leveling section for an idea of point priority while leveling up.


The Pantheon System:

Spoiler
These choices are likely to be situational and changed often. However I feel like there are a couple you could always run with if your only intention is to run Uber Lab day in and day out.

This Major Pantheon Power will likely be the choice for me. You need to kill Lunaris at the end of Act 8 AND capture Master of the Blade from a Strand Map in order for this to be unlocked.

The base effect is literally perfect in that it gives us extra defense against Izaro AND makes us run faster while we pass through other parts of the Uber Lab.
The secondary effect works well with our build because we already have a 90% chance to evade and up to 25% chance to block. This Pantheon Power will almost completely give us immunity to any follow up attack that happens after we take a large hit.


There are several Minor Pantheon Powers that I see useful.

The Soul of Tukohama will likely be useful on some days when Izaro is doing large amount of physical damage. You'll have plenty of time to stack this up to 8% before the fight starts because you have to put up 20 stacks of BV anyway. The secondary effect is null because of Vaal Pact.


Another, arguably more useful minor Pantheon Power is the Soul of Gruthkul. For general purpose gameplay and days when Izaro is using 2x swoards, this will likely be the best available option.

Both the primary and secondary aspects of this Pantheon Power are very strong.

This part of the guide was written before 3.0 and does not include any information from Acts 9 or 10. As I find out more information I will update this section accordingly.


Gems:
Spoiler

Unfortunately this part is going to be very specific (and for good reason).

*IMPORTANT*

While I absolutely suggest new players use the gems listed below, I'd like to give elitists an opportunity to look at the gem setup I was using to get rank 1 jewels at the start of the league. Please import the PoB pastebin below to see the aforementioned gem setup.

Path of Building Pastebin: https://pastebin.com/XpFwLVYi

How to get off colors on your gear using jewellers and not chromatics.

Helm -


Chest -

^* This is the order of priority when socketing gems into your BV link.

Gloves -

*Do not level arcane surge past level 7

Boots -


Ring (Essence Worm) -


1h Running -


Shield Running -


1h Damage -


Shield Damage -


IT IS RECOMMENDED TO BE LEVEL 85+ TO FARM UBER LAB. 4,000 Life 2,000 Mana

Leveling:
Spoiler
I'll start by showing the optimal pathing for the skill tree and afterwards explain the useful leveling items and skills.

31 Point Tree
It's very important to get both of the Skill Duration clusters as soon as you can. Primal spirit should be taken when you start to notice you can not level up gems due to lack of strength and int.

51 Point Tree
Travel to the Templar area for some easy damage and much needed quality of life AoE. We then travel to the Witch area damage node for more quality of life and a bit more damage. This travel will put us in a good position to allocate points when we start scaling crit in the near future.

68 Point Tree
It's at this time in the leveling process where you realize it's time to use some defensive points and get ready for the lack of resistances and harder boss fights. Grab the Evasion / Life nodes before pathing up into the shadow starting area for more health nodes.

81 Point Tree
So we're basically at the point where we pick up a diamond flask and get all the crit nodes on the tree that we've conveniently passed by in the leveling process.

AT AROUND LEVEL 70 - 75 YOU SHOULD BE REFUNDING THE TEMPLAR NODES

99 Point Tree
Now you'll have MoM, Vaal Pact, and most crit nodes the build requires to be fully functional. Now just make sure you have the proper sockets and allocate the proper gems in them to start cruising to leveel 85 and beyond!

The Final Skill Trees* Are Listed In The Passive Tree Section
There are 2 trees you can pick from depending on your preference between movement speed and life.

Ascendancy Order of Importance
Nature's Boon > Master Alchemist > Nature's Adrenaline > Veteran Bowyer

My Personal 3.0 Leveling Strategy
Spoiler
This strategy was most efficient for me because I was not interested in spending huge amounts of regret orbs while leveling with bows or anything else.
As a ranger I found the best way to level early was to get shrapnel shot, fire trap, and siege ballista.
This setup will last you until you get blade vortex at level 12
Level 12 is when the switch to full spell damage happens.
Drop shrapnel shot and siege ballista.
Pick up a spell totem and firestorm from a friend.
Socket blade vortex, added fire, added cold.
Finally make sure you have 2 wands equipped.
*Tip* Keep your bow on your weapon swap so you can blink arrow over large gaps

In act 2 you will get much stronger.
Start running Herald of Ice and Herald of Ash.
Help Alira the bandit.
Keep blade vortex linked with added fire and added cold and if you get a 4th link try out the new onslaught gem.
Pick up a trap and mine support gem from the vendor for your flame trap.
Put culling strike on your firestorm spell totem setup. (It wont be doing much damage but it can at least be useful)

Act 3 is where you pick up the Hatred gem. You may drop the heralds for this.
The next big thing that happens in act 3 is that you get bladefall from the vendor at level 28. Swap out the firestorm and start bladefalling toteming. This will start doing more damage especially with the hatred aura.
Make sure to unlock Siosa in the library so you can purchase much needed skill gems without having to bother others for their time.

After act 3 it's smooth sailing. Fire trap / Bladefall Totem / Blade Vortex will carry you until you're ready to make the switch to pure Blade Vortex at around level 65-70 (maybe sooner if you have unique items).

Ideally the gem links will look like this:
Blade Vortex - Spell Echo - Added Cold Damage - Added Fire / lightning
Fire Trap - Conc Effect - Controlled Destruction - Trap and Mine Support
Bladefall - Spell Totem - Controlled Destruction - Increased AoE
Flame Dash - Arcane Surge - Faster Casting

Useful leveling Weapons


Path of Building Pastebin:
Spoiler

MY Current Gear and Skill Tree Optimized for Uber Lab
Spoiler
https://pastebin.com/PRtQDB5E
*This is the exact setup I was using off stream to put down my best times.

*Note: I've got the Voideye unique in the build but for simplicity sake I've scaled the grace gem to 24 to replicate the effect of the ring so that I don't have to constantly swap from the currently equipped Essence Worm.


My Gear and Skill Tree Optimized for Shaper / Guardians
Spoiler
https://pastebin.com/9FXypLe9

*You can run this same exact setup in Uber Lab but this is WAY overkill on damage. It's meant to be used for Guardians / Shaper.


Path of Building Configuration: I am trying to simulate the damage I would have for Izaro. Nothing else matters to me.

Shock Changes
"
Similarly, Shock no longer increases the damage taken by enemies by a fixed amount for a variable duration. Now, Shock will apply to enemies for a duration of 2 seconds and increase the amount of damage the shocked enemy takes based on the Lightning damage dealt to the enemy. A purely Lightning hit which removes 10% of an enemy's life will increase the damage that enemy takes by 50% for 2 seconds, scaling linearly down to 0% at no Lightning damage dealt. Shock is still only applied by critical strikes or based on your chance to shock.


"
Other non-hit sources of Shock and Chill, unless otherwise specified in the debuff, will increase damage taken by 20% and slow by 10% respectively.

As a pathfinder our Ascendancy gives us a 20% chance to shock for 20% increased damage.

Please remember that shock has changed and it will no longer be 50% damage increase. The Path of Building number is currently inflated.

Izaro is a standard boss.


Honorable Mention

I would like to give a shout to itsMartini for creating such a successful guide
[2.6] The Roadrunner -- Lab Speedrunner and BossKiller [w/ Videos]
He has been a huge help to the community and allowed many people to try something new and adventurous.


And how i see the setups of ur pastebin links when i dnt know what is that pastebin thing xD. U linked a link, i go to pastebin and what ive to do then....
@execreth - @eledhyr - @arthasspaw - @edherisctf - @douchebagontheway_hd

@the_pest - @ioneshotbosses_eightkai

Signaler

Compte à signaler :

Type de signalement

Infos supplémentaires